
Printing & Packaging Technology · 2026-10-16
The 2D Code Worked on Screen—Why Did It Fail on the Carton?
PACK EXPO 2026 is putting industrial 2D coding in the spotlight. For paper-packaging buyers, the real risk is not generating the code—it is preserving contrast, geometry and scan performance on the finished carton, kraft pack or label.
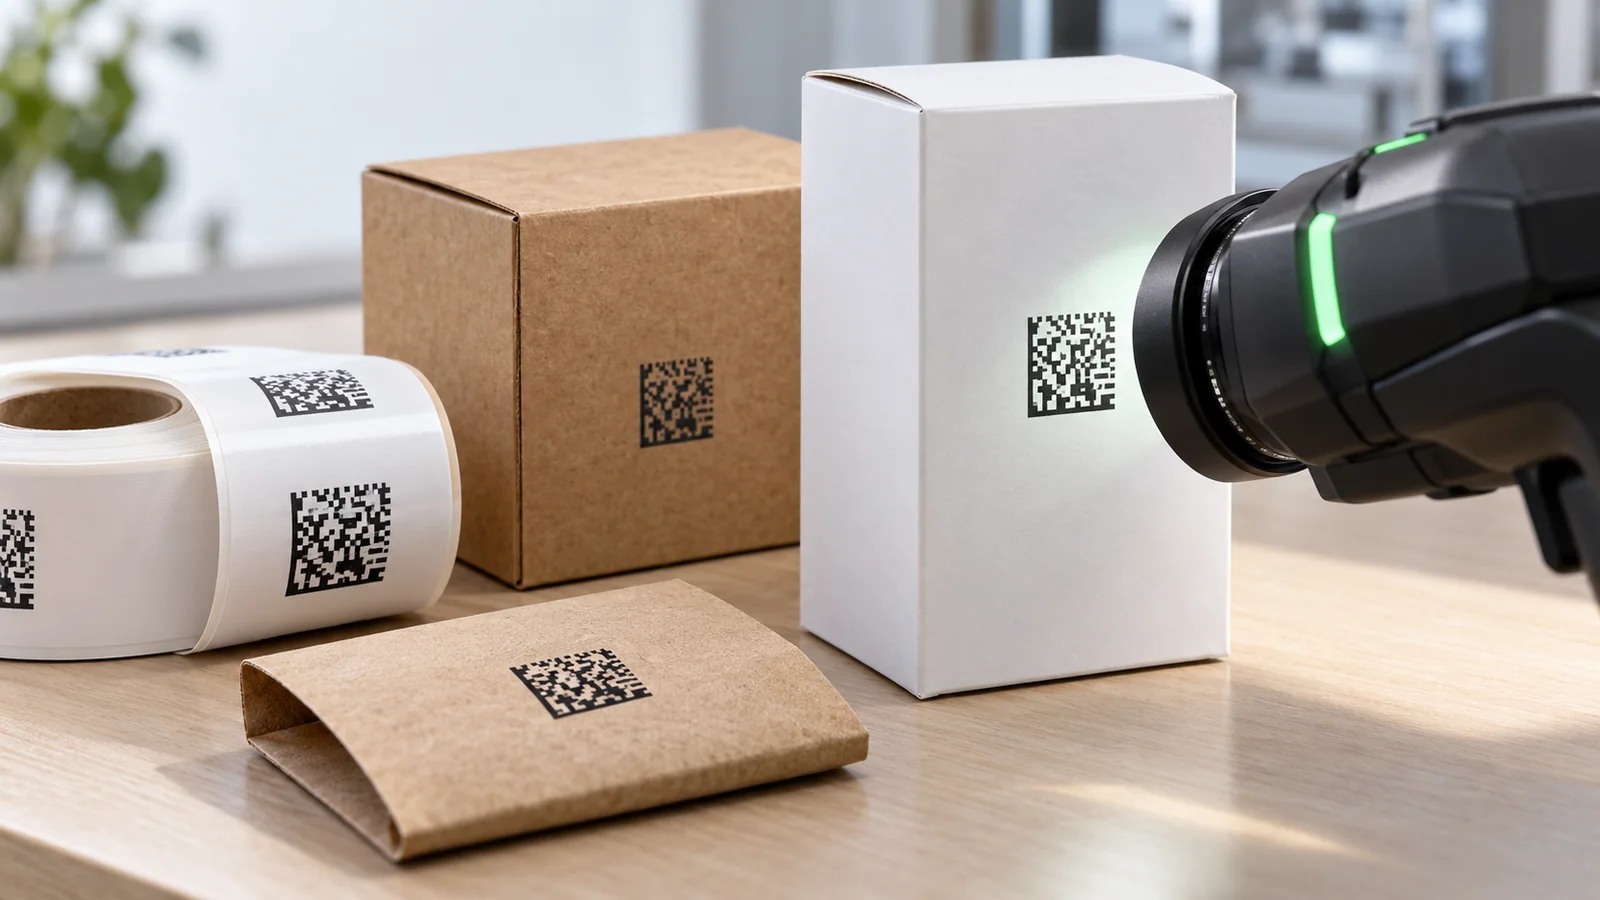
The artwork file looked perfect. The 2D code scanned from the monitor and from a laser proof. Then production started: the same symbol became softer on uncoated paper, lost contrast on brown kraft, or reflected light from a glossy varnish. A code that existed in the design was no longer a code that could be read reliably on the finished package.
This is becoming a practical buying issue, not a niche prepress detail. PACK EXPO International 2026 opens in Chicago on 18 October with more than 2,700 exhibitors and a strong focus on automation, materials and production technology. One scheduled session addresses the difficulty of producing industrial 2D codes at speed while maintaining readability and GS1 performance requirements. See the official PACK EXPO announcement and the industrial 2D coding session.
For paper-packaging buyers, the lesson is straightforward: the barcode is part of the material specification and converting route, not just part of the artwork.
This guide explains what to approve before printing a 2D code on folding carton board, kraft packaging, paper labels or other fibre-based formats. It is a production checklist, not a substitute for the current GS1 General Specifications or verification by a qualified barcode specialist.
Why a Digital Code Is Not a Finished-Pack Result
A digital file defines the intended pattern. The printed package introduces variables that can change that pattern:
- paper shade and surface reflectance;
- ink spread, absorption and drying;
- coating, varnish or lamination;
- press resolution and registration;
- carton curvature, folds and glue seams;
- abrasion during filling, packing and transport;
- variable-data equipment and production speed;
- camera, lighting and scanner angle at the point of use.
GS1 notes that 2D symbols can hold more information than traditional linear barcodes, but reliable use still depends on correct size, contrast, placement, quiet zones and print quality. Review the GS1 barcode standards overview and GS1's retail 2D implementation guideline.
The correct approval object is therefore not the PDF alone. It is the printed and converted package under realistic scanning conditions.
1. Define What the Code Must Do
Before selecting paper or reserving artwork space, identify the code's role:
- retail point-of-sale identification;
- batch, lot or expiry information;
- warehouse and logistics traceability;
- authentication or anti-counterfeit workflow;
- consumer information through a GS1 Digital Link or other approved route;
- internal manufacturing control.
Static data can often be printed with the main graphics. Variable data may need an unprinted panel for inline inkjet, laser or thermal transfer coding after the carton or label is produced. The buyer should tell the paper supplier, printer and packer which stage applies the code and which scanners must read it.
Do not place a dynamic code area over a heavy varnish, deep embossing, foil, fold or textured pattern simply because the artwork has available space there.
2. Match the Code to the Paper Surface
The same code artwork behaves differently on different papers.
Coated folding carton board
Folding box board and C2S art board can support sharp edges and fine print, which helps code definition. The risk shifts to gloss, lamination, surface reflection and cracking if the code crosses a crease. Keep the symbol on a flat panel and test after every coating or finishing operation.
Natural kraft paper
Kraft paper has a brown fibre background that reduces contrast, especially for dark-green, brown or low-density black inks. A white underprint or light label may improve readability, but it changes cost, registration and recyclability considerations. Approve the actual kraft shade because batch-to-batch colour variation can affect the result.
Uncoated and recycled papers
Absorbent or porous sheets can increase dot gain and soften small modules. A code that looks clean on coated stock may close up on an uncoated surface. Increase robustness through suitable module size, ink control and a representative print trial rather than trying to repair a failed code after production.
Pressure-sensitive labels
Label paper can create a controlled light background on dark packaging, but the complete label still matters. Curvature, wrinkles, adhesive failure, condensation and application tolerances can distort or hide the symbol. Verify the label after application to the real container.
3. Protect the Quiet Zone
The quiet zone is the empty margin around a barcode. It helps the scanner locate the symbol instead of confusing nearby graphics with code data.
GS1's retail guideline states that a GS1 DataMatrix or Data Matrix generally needs a quiet zone equal to one X-dimension on all four sides, while a QR Code uses four X-dimensions. The exact requirement depends on the selected symbol and application standard, so the designer should work from the applicable GS1 specification rather than a visual guess.
Common quiet-zone failures include:
- placing text, rules or patterns too close to the code;
- letting a background image enter the margin;
- trimming or folding into the required space;
- adding a decorative frame around the symbol;
- printing variable data outside its reserved panel.
Treat the quiet zone as protected technical space in the dieline. It is not spare space for a last-minute claim or icon.
4. Use Contrast That the Scanner Can See
Black modules on a white background remain the safest combination, but packaging design often asks for brand colours. GS1 advises using dark bars or modules on a light background and warns that colour choices must be evaluated for scanner response, not only visual appearance. See GS1's barcode colour guidance.
Avoid assuming that two colours with strong visual contrast will produce strong scanner contrast. Red illumination, metallic inks, transparent varnish, pearlescent paper and foil can behave unexpectedly.
For premium packs, keep decorative finishes outside the symbol and its quiet zone unless the complete combination has been verified.
5. Set a Realistic Module Size
Smaller codes save artwork space but give the printing process less tolerance. Ink spread, paper fibres, plate wear or camera focus can turn small square modules into irregular shapes.
The GS1 2D guideline defines acceptable X-dimension ranges for retail applications and explains that the module size and quiet zone must support reliable decoding. The selected size should be checked against:
- symbol type and amount of encoded data;
- printing resolution and process;
- paper roughness and absorption;
- scanner distance and speed;
- package curvature;
- expected wear, moisture or abrasion.
Do not reduce a verified code proportionally in the final artwork without repeating verification.
6. Separate Static Graphics from Variable Coding
If every package carries the same identifier, the code may be printed with offset, flexo, gravure or digital package graphics. If each pack carries batch, serial or expiry data, the production line needs a controlled variable-data area.
Give the coder a stable background and specify:
- printable panel dimensions;
- paper or coating surface;
- coding technology and ink;
- line speed and drying time;
- inspection-camera position;
- reject logic for unreadable codes;
- data source and changeover control.
A premium color card or textured paper may look excellent but still require a dedicated label or prepared coding panel if the line cannot maintain contrast and edge definition.
7. Verify After Printing and After Converting
A smartphone scan is a useful quick check, but it is not a formal print-quality result. GS1 references ISO/IEC 15415 for assessing 2D barcode print quality. Verification should use the correct aperture, illumination and application specification, and should produce a report that can be linked to the approved sample.
Run checks at several stages:
- printed sheet or reel;
- after varnish, lamination or coating;
- after die-cutting, folding and gluing;
- after variable coding;
- on the filled package under realistic line and scanner conditions;
- after transport or abrasion testing when the code must remain readable through distribution.
Sample across the web or sheet, not only from the first good impression. Record the press, date, substrate batch, ink or coder settings and verifier result.
A Buyer Approval Table
| Decision | What to specify | Evidence before approval |
|---|---|---|
| Code purpose | POS, logistics, batch, consumer or internal use | Correct GS1 application and data owner confirmed |
| Symbol | GS1 DataMatrix, QR Code or other approved carrier | Artwork and encoded data checked |
| Substrate | Exact paper grade, shade, coating and treated side | Representative blank and printed sample |
| Size | X-dimension, total symbol and quiet zone | Dieline review against current specification |
| Colour | Module and background colours | Contrast and verification on production material |
| Placement | Flat panel, distance from folds, seams and edges | Converted-pack sample |
| Process | Static print or variable coding route | Press or line trial at target speed |
| Quality | Required verification method and acceptance grade | Verifier report linked to sample and batch |
| Change control | Substrate, ink, coating and artwork revision | Written reapproval rule |
What to Send in a Paper RFQ
When requesting paper for code-bearing packaging, provide more than GSM and colour. Send:
- packaging format and destination market;
- exact paper or board family;
- grammage, caliper and dimensions;
- coated, uncoated, kraft, coloured or label surface;
- static or variable code process;
- intended printing and finishing route;
- code panel location and approximate size;
- required moisture, barrier or food-contact documents;
- quantity, sheet or reel format and destination port;
- representative artwork or a non-production test target.
YOUNGSUN PAPER can provide representative samples and available specifications so the printer and converter can test the chosen substrate. Standard samples are free; international courier charges are paid by the customer. Request samples for a print trial, review packaging and printing applications, or compare relevant grades in our product catalogue.
Frequently Asked Questions
Why does a 2D barcode scan from a screen but fail on paper?
The screen has controlled geometry, brightness and contrast. Paper introduces shade, roughness, ink spread, coating, reflection, folds and production variation. Approve the code on the finished package rather than from the digital file alone.
Is coated paper always better for 2D codes?
It often supports sharper edges, but gloss, varnish and lamination can create reflections. Coated and uncoated papers can both work when the code size, ink and verification plan match the actual surface.
Can a 2D code be printed directly on brown kraft?
Yes, but contrast must be tested on the selected kraft shade. A dark code may need a light underprint, prepared panel or label. Verify the final printed and converted structure.
Is a successful smartphone scan enough for approval?
No. It is a useful functional check, but production approval should follow the applicable GS1 and ISO/IEC print-quality method with a verifier and documented acceptance criteria.